Grouted machine feet
If you’re making a large and permanent machine, you may find yourself having to grout it in after commissioning. Here’s a few tips to make that process smoother.
Jacking screws
If you want your machine level, give yourself a way to level it. A threaded hole in each machine foot enables you to wind a bolt in and jack the foot up against the floor. Depending on how big the installation is, you could use a dumpy level to survey the foundation and pre-shim it to a set level- but you may have to play around with the level a bit anyway once done.

Grout
After the position and levelling of the machine is done, grout is typically installed between the feet and floor. This is done by making a quick form by nailing together some pieces of wood around the foot and pouring in the grout. So, your foot needs to be a simple shape or you’ll end up trying to do advanced carpentry with a handheld Skillsaw on site. Also, you need to be able to pour in the grout so you need a generous hole or chamfer to do it.
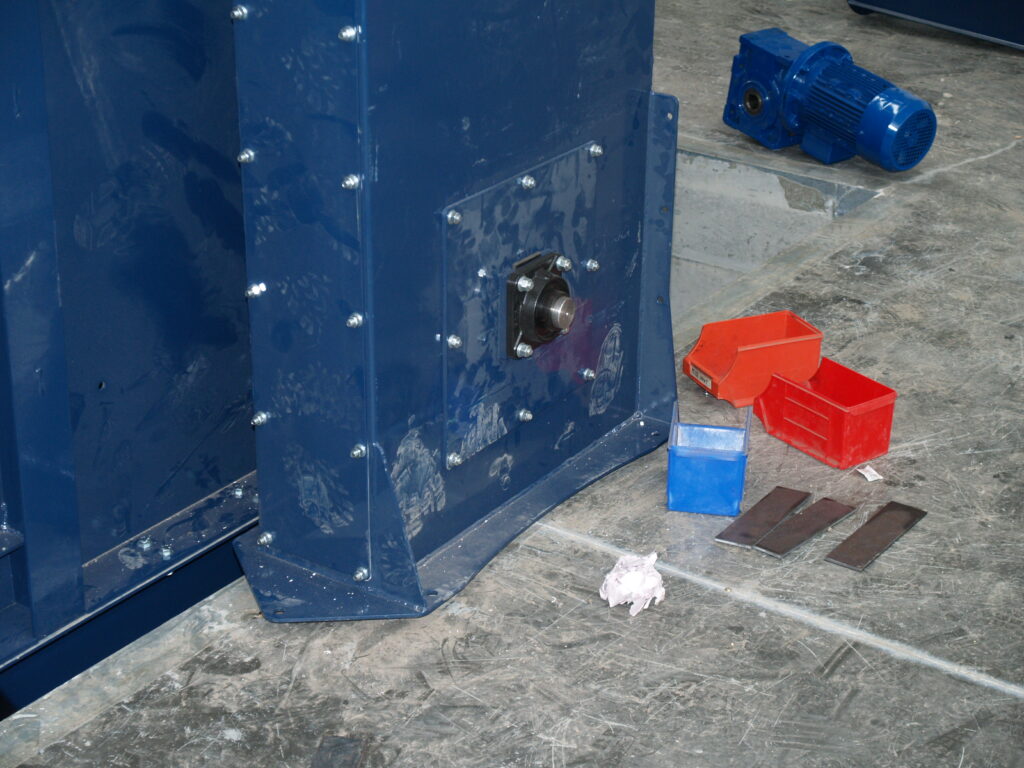
I’ll start with an image of what not to do. Below is a machine foot that I made a long time ago. It looks fantastic. The subtle curves. The sweeping lines. But it was awful to grout. Mitre angles are now required in the grouting form. To make matters worse, it’s at the edge of a pit, requiring a piece under it to stop the grout from flowing out.
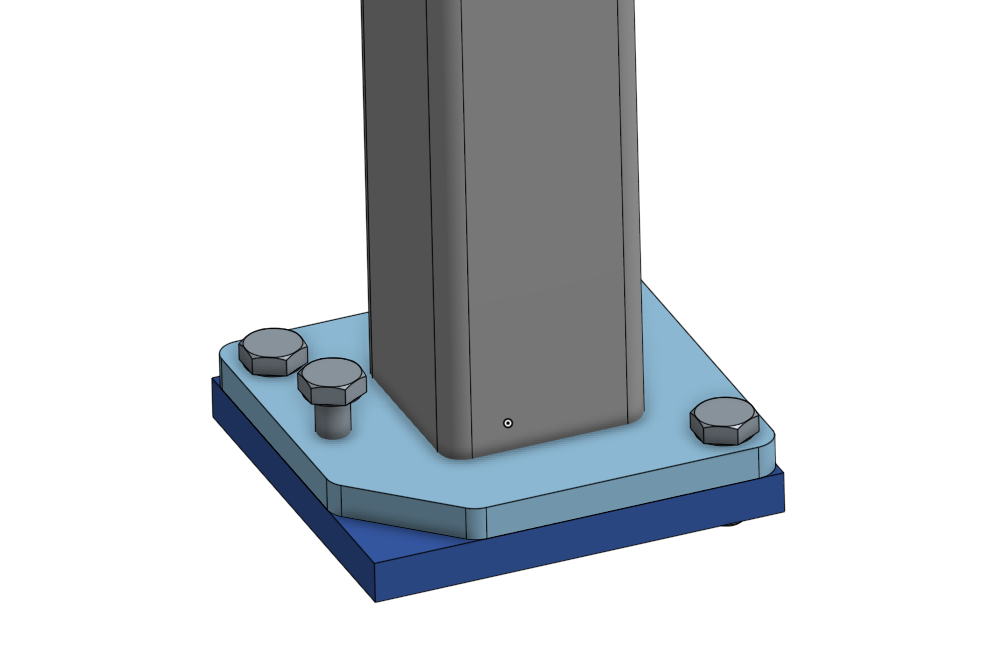
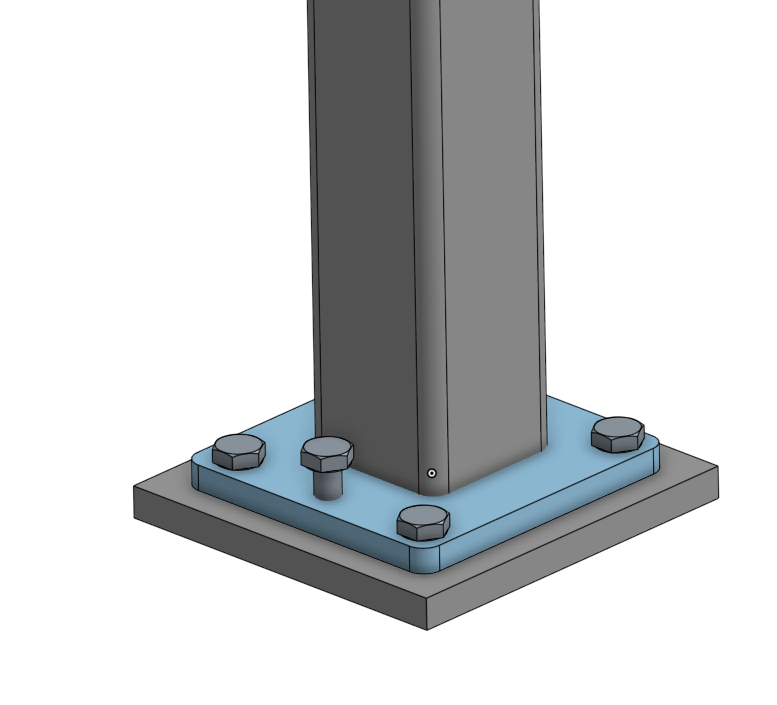
Here’s a more sensible foot. It’s basically square. There are 3 bolts to hold it down and one jacking bolt. I’ve put a generous chamfer in one corner so that a wooden form can be made to match the base plate and the grout poured into the chamfer.
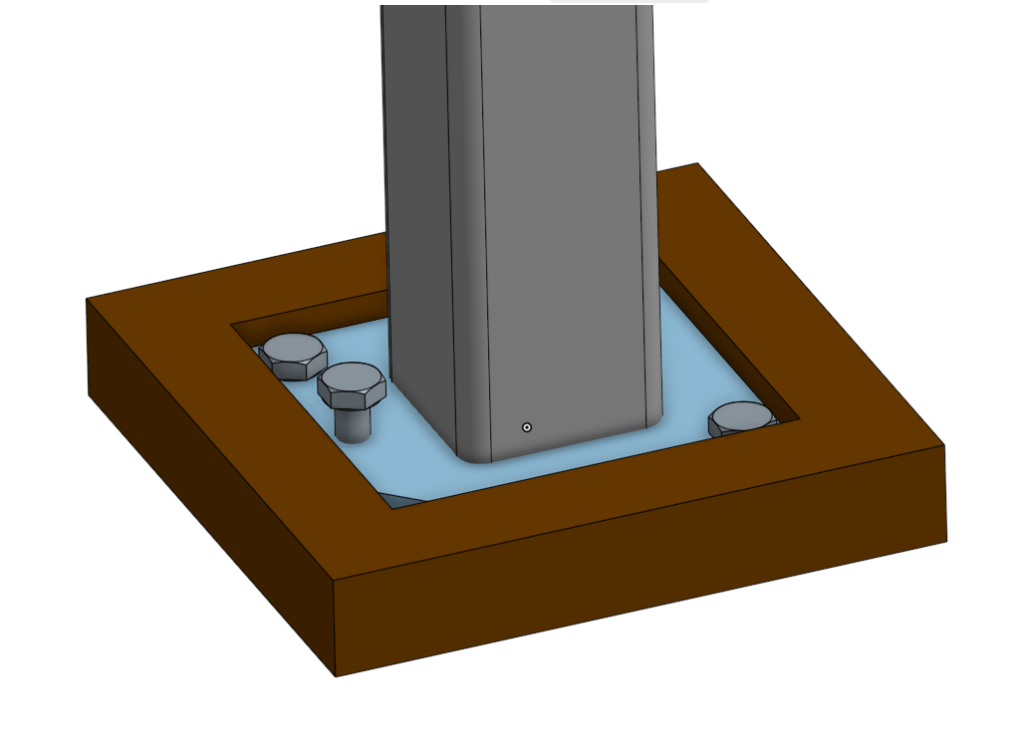
Another alternative is shown below. Here, instead of the big chamfer, I’ve just made a form larger than the base plate so the grout can be poured in the sides. This looks a bit less funny but does use a bit more grout. Using a bit more grout doesn’t matter for such a small foot but for large foundations, this can add up.
Anchors
This is an article in itself (And one better read on the ramset website) but I’m adding a paragraph here to sort out the exact anchoring method before you cut steel. You may be drilling from a foundation plan and then lowering the machine onto it, in which case, sure, M16 anchors through 18mm holes is no problem. More often, though, we’re dropping a machine in place and then match drilling the floor. In this instance, you may be trying to get an 18mm drill bit through, a daggy, burry, laser cut 18mm hole which didn’t end up being actually 18mm. Then, after giving up, marking the floor, moving the machine, drilling the floor and replacing the machine, you realise that the glass Chemset capsules that you were planning on using also won’t quite fit through the hole. Give yourself some extra clearance.
Make a template part
Once you’ve made one well designed machine foot, the rest of them will be quite similar. Rather than redrawing them every time, save it as a template and save yourself 30 seconds on every foot on every subassembly on every future project you have. Have fun and put your best foot forward.