Thermal inspection on a low budget
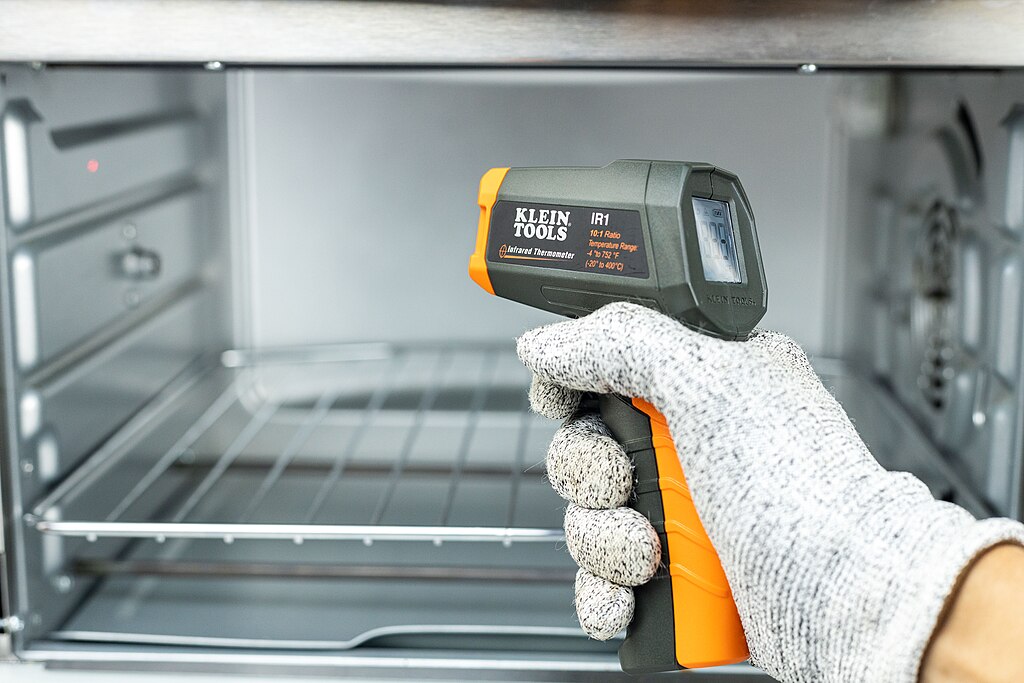
Flir (Forward looking infra red) is an extremely useful technology for inspection but it is expensive. For the cost of the equipment that you may have to manage, it’s probably minuscule but even so, sometimes it’s hard to justify a capex without some proof ahead of time that it will actually be useful. Or perhaps you are running a small operation and you can’t justify 4 grand on a nice-to-have. In either case, you may be happy to hear that if you know what you are looking for, you can do almost anything Flir can do with a simple IR thermometer.
Sure, it’s nice to wave a flir camera around and look at the pretty colours but for a proper, methodical inspection, what you should really be doing is checking specific places under similar conditions and writing down the temperature. Knowing that a bearing is 50 degrees isn’t particularly descriptive but knowing that it was 30 degrees all day every day until yesterday tells you a whole lot more. You can definitely do this with an IR thermometer but it requires a good PM process.
Pitfalls of thermal measurements
If you’ve done a cursory search before in Flir or infra red temperature measurement, you have probably seen on almost every website that infra red measurements don’t directly tell you the temperature of the item that you’re pointing it at. They tell you the sum of the transmitted, emitted and reflected infra red radiation. But what exactly do you take away from that?
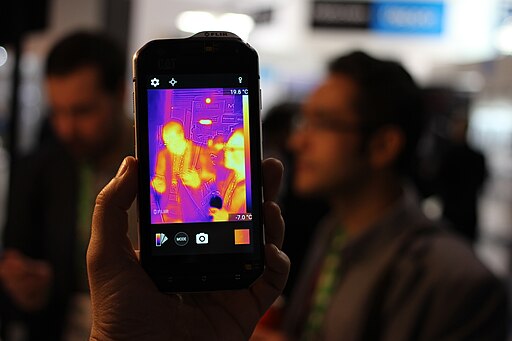
Look closely at the below image and you’ll see that in the foreground flir image, the glasses on the guy on the right appear dark (cold) but looking at the background image, they are clear. This is an example of something being visually clear but thermally opaque. The reverse also happens- A garbage bag, for example looks black but is thermally clear.
.jpg)
For our purposes, the main takeaway here is that solid, clear machine guards, even though they are visually transparent, are likely to block our thermal reading. For the purposes of thermal measurement, coarse mesh guards are easier to work with but you can also modify your clear guards to have coverable peepholes where appropriate. Where “appropriate” is again goes back to the PM process (and risk analysis). Once you know where you want to be checking, then you can place your peepholes.
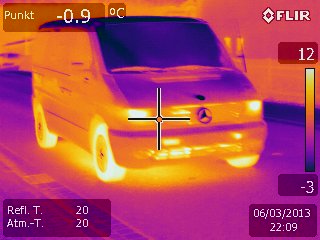
The below image shows examples of reflection and emissivity. Looking at the van in the below image, you will notice a few anomalies. Firstly, the front windscreen looks cooler than the side windows and the engine cover looks cooler than the doors. This doesn’t make sense. What appears to be happening is that you are seeing reflected sunlight. This isn’t usually an issue in the industrial environment but you can be misled by shiny surfaces and overhead lighting.
Secondly, notice how the wheel centres appear to be much colder than the tyres and slightly colder than the wheel arches. This doesn’t make sense either- The tyres will be generating a fair bit of heat from deflection but there shouldn’t be this much difference between them and the wheel centres. What’s happening is that because the tyres are black rubber and the wheel arches are black polypropylene, they have a very high emissivity, whereas the wheel centres, either polished or painted aluminium, have a lower emissivity.
You can set both flir cameras and IR thermometers to a particular emissivity but that takes time. To get around the emissivity and reflectivity issues, I prefer these two cheap tricks:
The first is these cool labels from Homershams. They have a fixed emissivity and they won’r reflect overhead lights. In a pinch, masking tape is also OK but these have a known emissivity and a nice blank spot in the middle where you can write a label. What should you label it with? Again, the PM process will drive that but you don’t have to get too fancy. Even something as simple as numbering them in sequence goes a long way.
If you don’t have room for a label like that (ie, you want to check a bearing or a shaft), you can apply a small amount of black porcelain paint. Below is an image with a link to Gordon Harris who stock it.
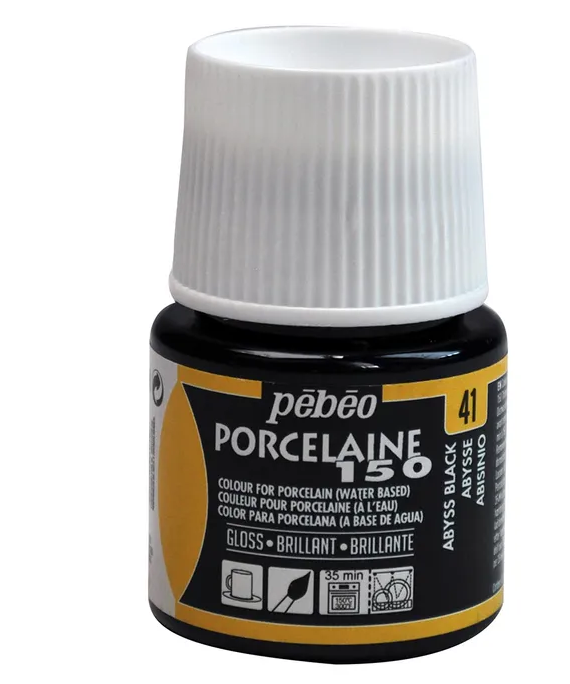
Gordon Harris black porcelain paint
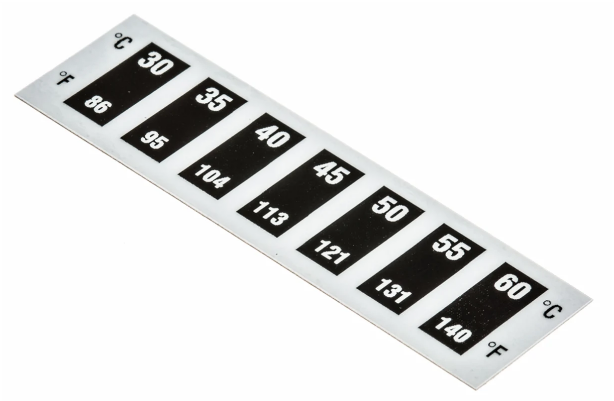
Temperature sensitive labels
One last handy trick is these temperature sensitive labels. The type shown below is reversible but you can also get permanent ones. These show the highest temperature they have reached which is handy if you are checking over a machine that isn’t running. As with other temperature measurements, this works far better if you consistently check and record the temperatures.
So there you have it. For as little as $40, you can start thermally monitoring your plant more effectively than someone with a $4,000 thermal camera, provided that you are methodical and disciplined in your approach. Your budget will thank you!